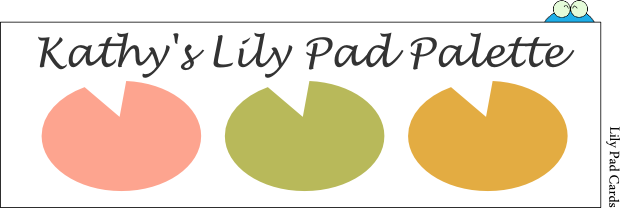
Finally Friday and time for another lily pad cards color challenge. Here are the colors you have to use.

Keep in mind, that this is a palette to get you inspired. There is no need to follow the exact colors… and you can add others as long as you use those. So here is the card I made using one of the digital stamps by our wonderful sponsor this week: “A day for daisies“.
Here is my card
I have added a second set of wings and some extra leaves for dimension. Here is a closer look:
Now if you are wondering how I did this card here are some photos that will walk you through the whole process.
How-to:
First I print the image more than once and color parts of it with copic markers. I always use my copics for quick coloring:
Then I use my scissors to cut out the main image and some extra parts. Yes, I love cutting…
and I glue everything together, making sure that leaves and wings are popping out:
And now I am ready to make my night sky. Before I started inking I trace lightly with a pencil around the area where I am going to stick the fairy. Not sure if you can see the pencil marks in the second photo:
and now I am ready to use my distress inks:
For the night sky I use “broken china” in the whole paper, “faded jeans” around the pencil traced area and “chipped sapphire” in the outer edges:
And now I am ready to use 3d foam adhesive and stick the little fairy on that sky
Here is a quick way to make the moon with you circle punch. I am inking a piece of scrap paper with “scattered straw”. Then I punch out a circle. I am putting the circle back in the punch and punch again:
Here is the finished card once more. I used gems for the stars.
If you read this post so far, you are a hero! LOL! I had so much fun playing around and inking my fingers to make this sky. Hope you enjoyed this photo-tutorial!
Now make sure you visit Lily Pad Cards to check what the rest of the Design Team has made to inspire you and to play with us!!!



What a fabulous card!!!!Love love love…..
Love this. Your inking is amazing! And your fussy cutting always amazes me. 🙂 Thanks for sharing!
Cute card! Love your inking – thanks for the tutorial 😉
Rx
great tutorial and beautifully colored image! i love your sky treatment the most…isn’t chipped sapphire the best blue for an evening sky? love it! wonderful card!
So gorgeous, Vicky! Your inked background is so fantastic and I love how you’ve cut out extra pieces of the main image for dimension. Your cards are always so brilliant!
Such a sweet image, Vicky and love how you brought this all to life!
Great card!
What a GREAT, FANTASTIC, AWESOME (ran out of my limited vocabulary)…tutorial! Love seeing how you made this masterpiece! Simply brilliant, Vicky!
i love this card realy pretty. im i big fan of work i love all of yor card
So peaceful! I was wondering how you got the perfect moon! The colors you achieve w distress are beautiful! Have a fantastic weekend ( or the rest of it by now for you!)
AWESOME! I love the night sky technique and the little fairy is adorable. Everything on the card is fabulous. Love how you share your talents with us ….
A beautiful project using my beloved Distress Inks. Definitely going to try that gorgeous sky!
Fabulous! Love the distress ink sky & how you punched the moon.
wonderful tutorial and i love that evening sky!
VICKI! What a fab tutorial! And the card is just gorgeous! Love the sky so much and your coloring rocks! 🙂
This is so pretty!
What a fabulous tutorial. Thank you!
cannot find this particular fairy sitting on a limb on the Day for Daisies site
Skies, day or night are always difficult for me. You make it so very simple. Your card is so sweet. Thank you for sharing your wonderful talents. Have a wonderful day.
NO one fussy cuts as well as you do. It drive me to distraction when I am forced to do it. Thanks for sharing.
Thank you for the tut I am not good with the ink blending so very useful, love the card too!